Online Demo / Training - Veterinary Management Software
1) All our Main Menu are on left hand side. When click the Main Menu on left hand side. Sub-menu on the right would change accordingly.
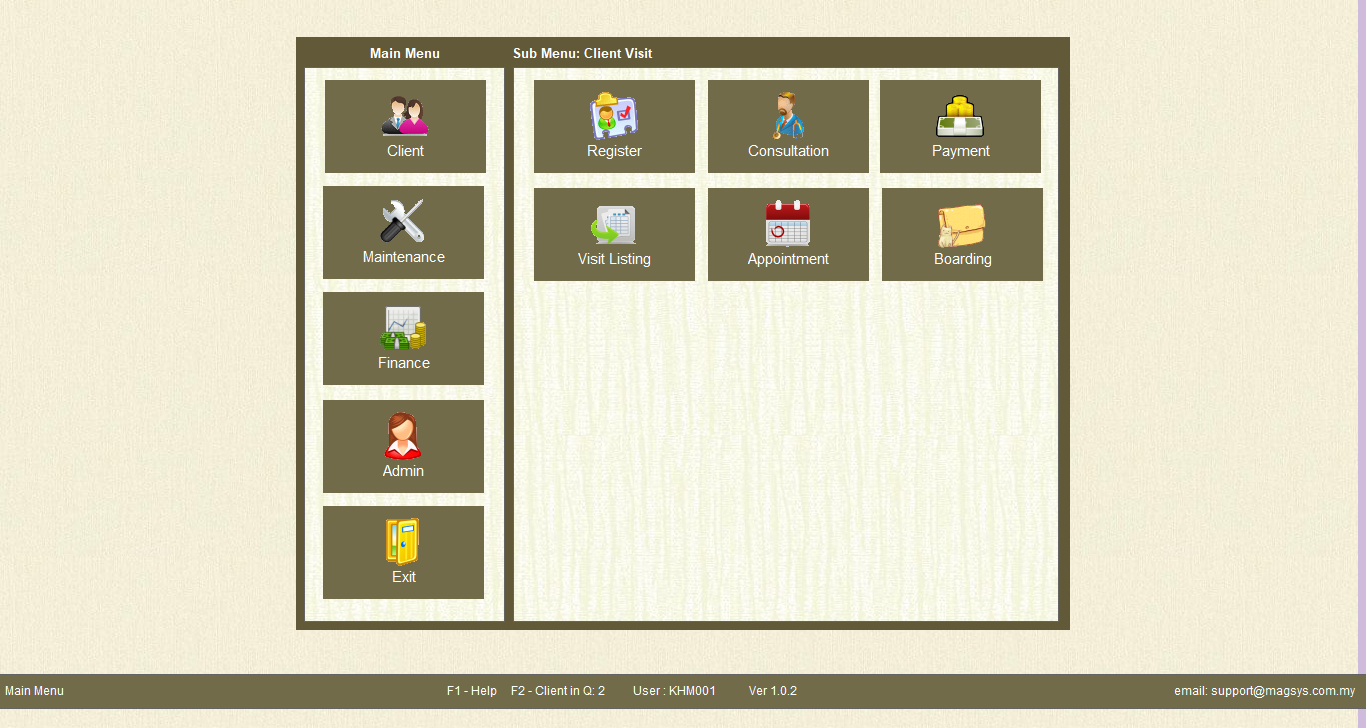
2) On the first Main Menu…Client. There are 3 main sub-menu on top. Registration, Consultation and Payment.
Registration
3) Click the first sub-menu……Register
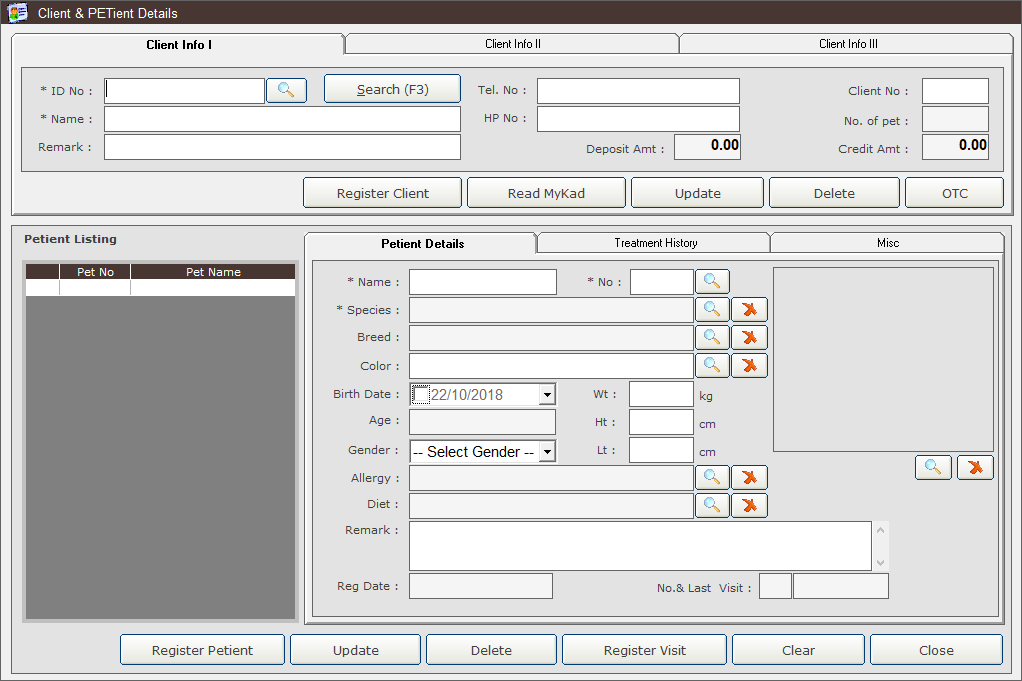
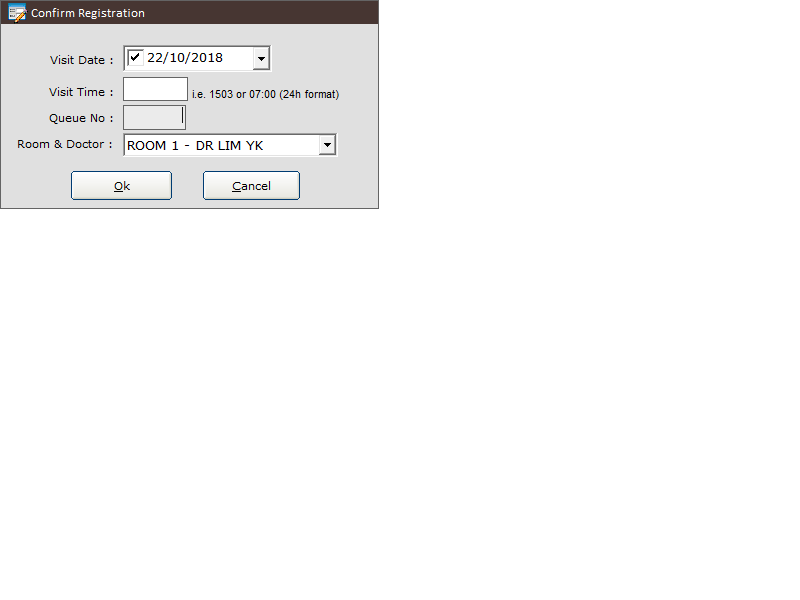
4) On the Registration screen. You can key in the patient’s particular manually or can click “Read Mykad” in the middle.
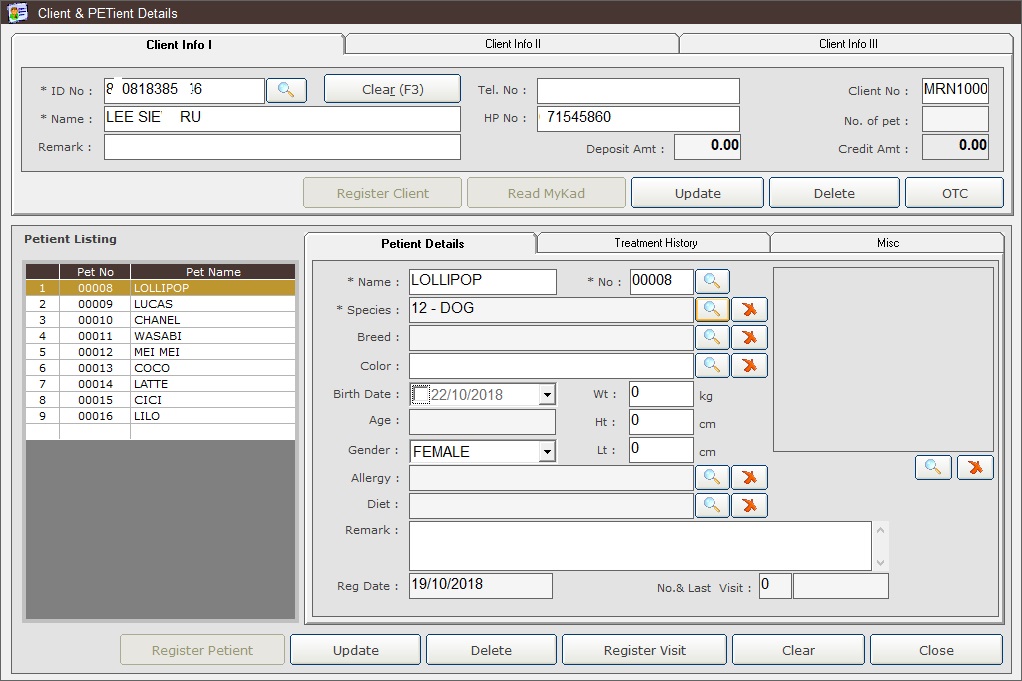
5) Can add the Pet name as a patient on the left. Can add other info like "Breed" etc.Then click “Register Visit” at the right bottom. A bell would ring when there is patient Register. This is to inform Veterinary Doctor that business coming in if the doctor at the wash room or doing some other thing.
Consultation
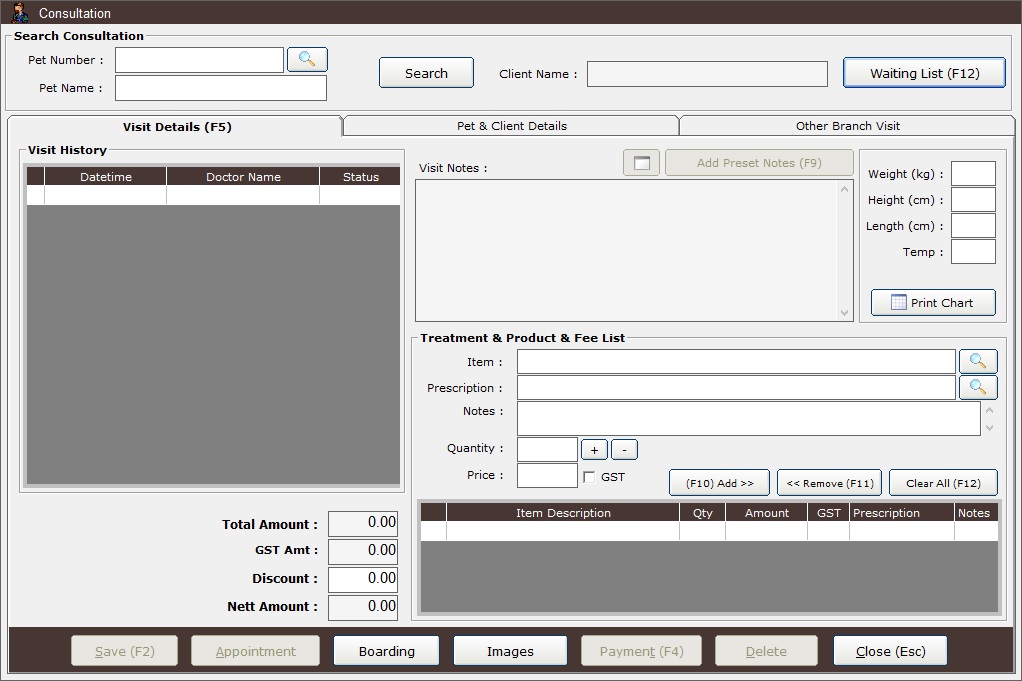
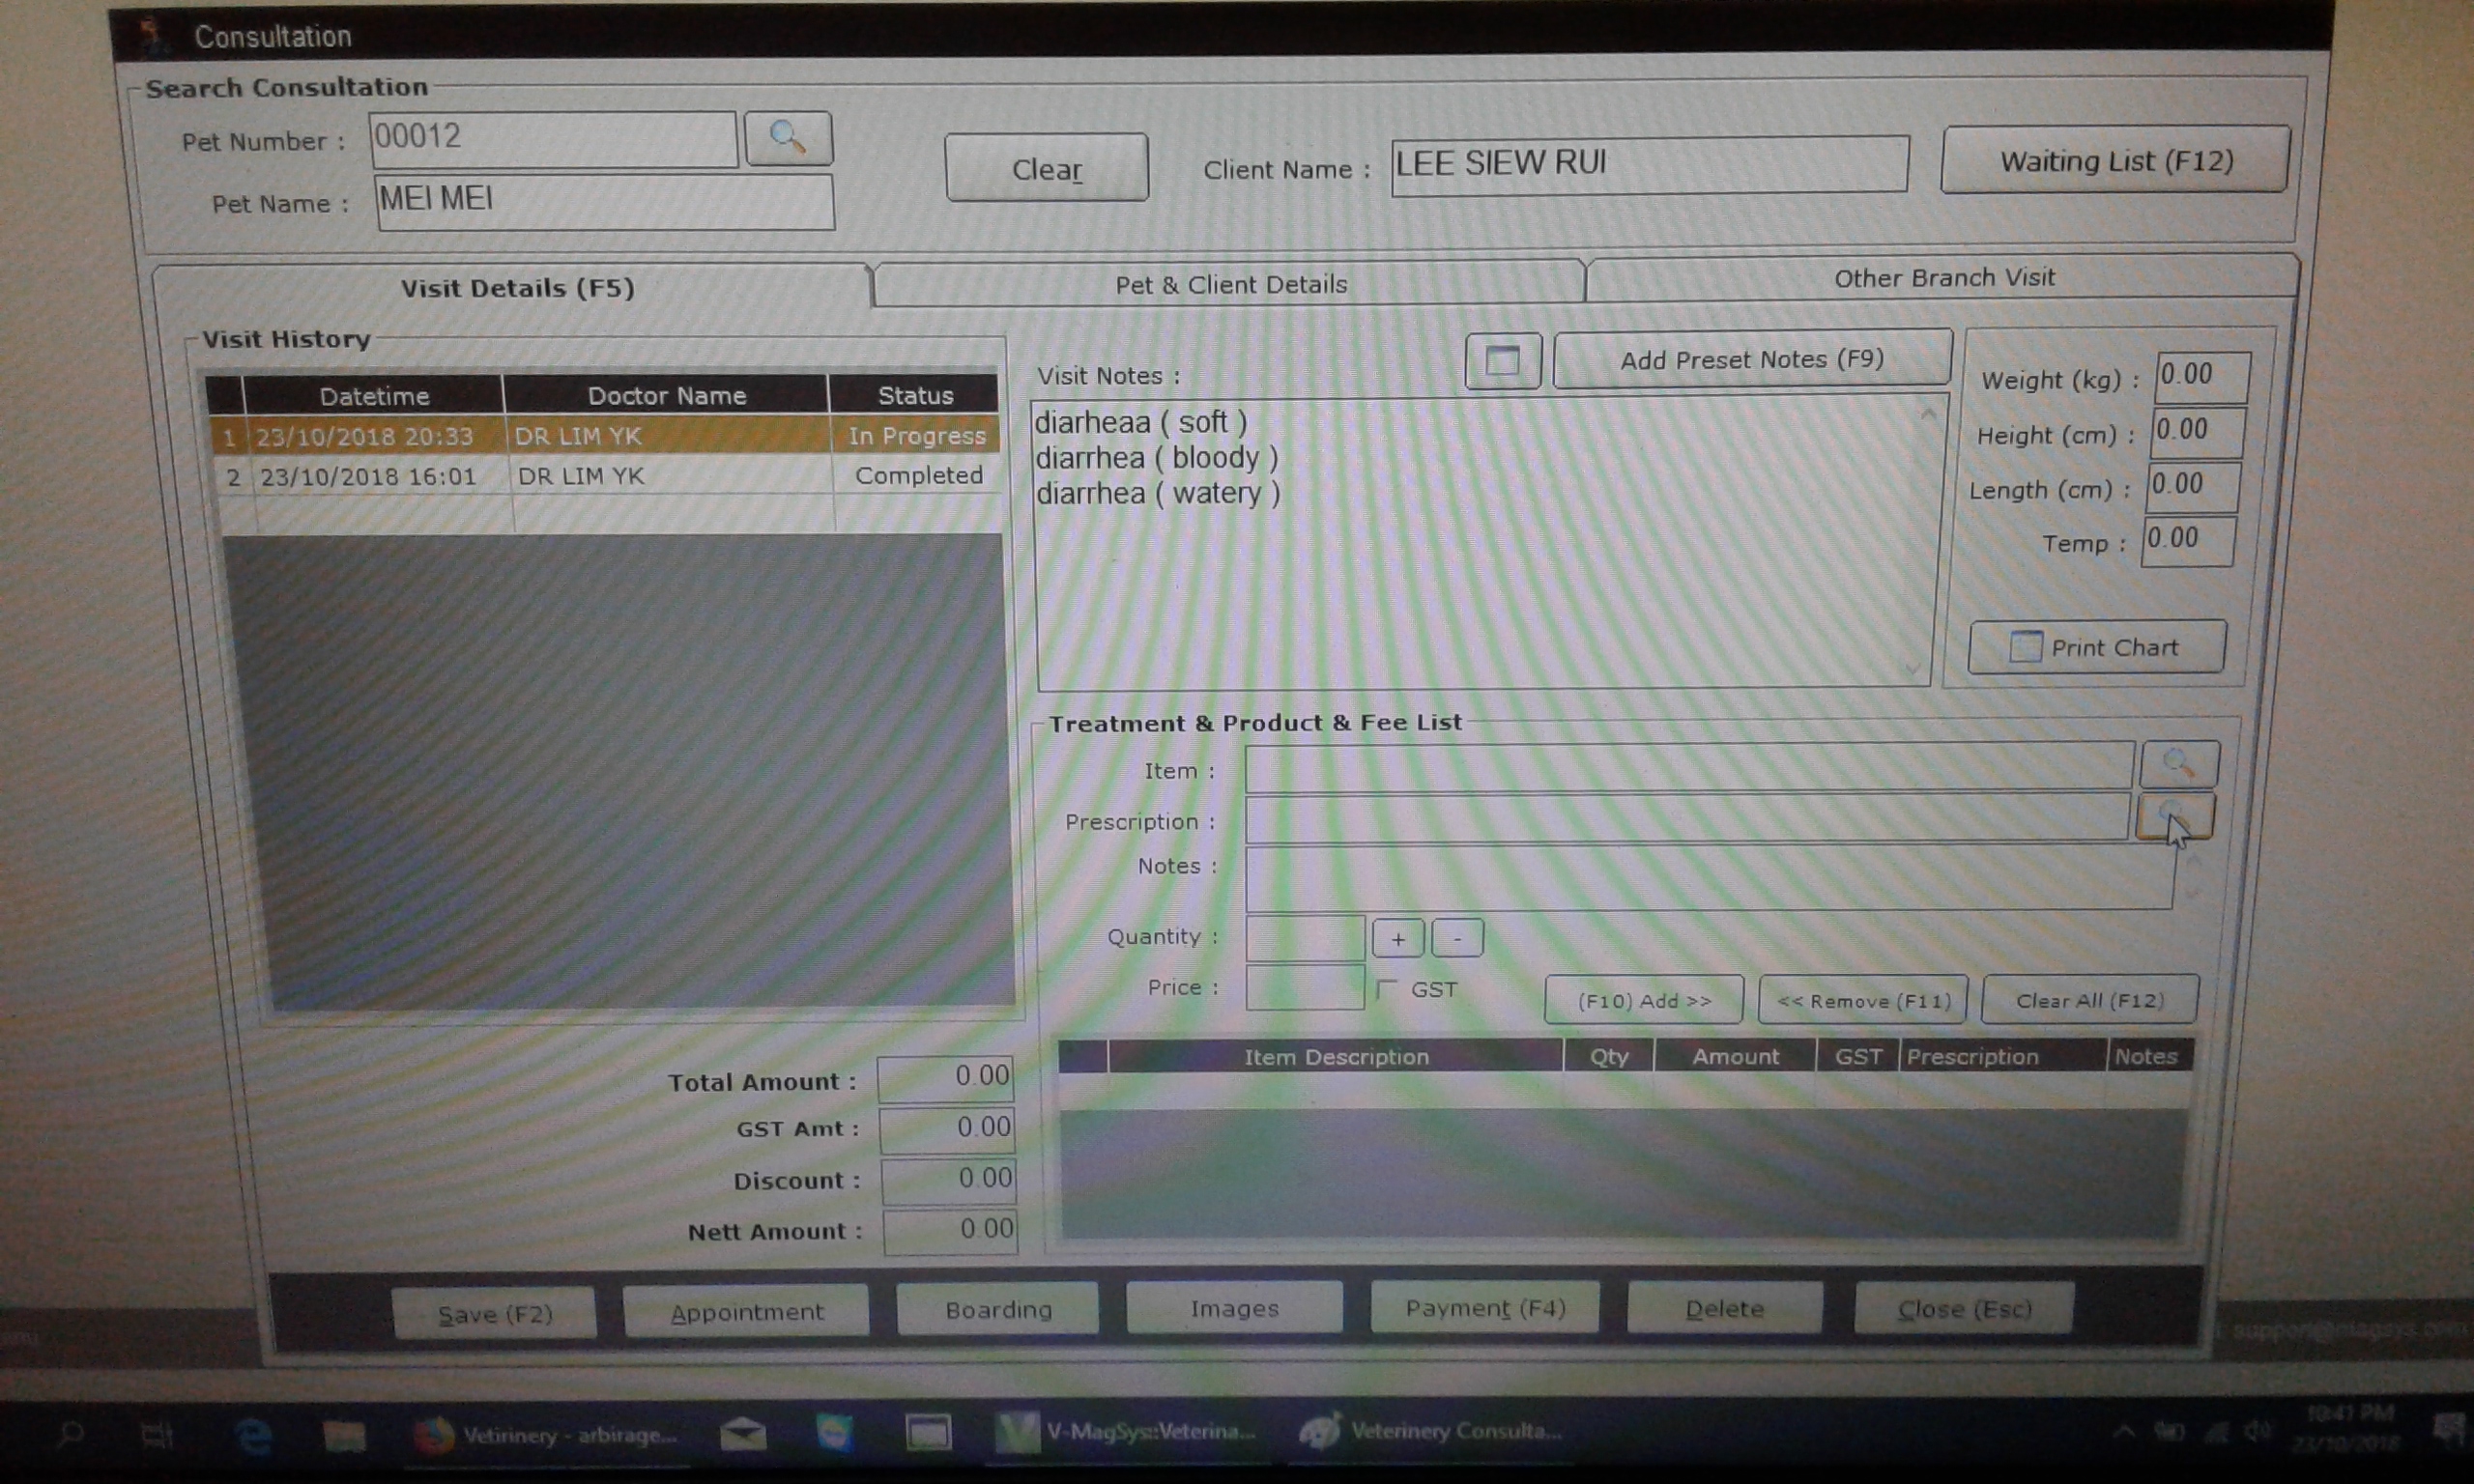
“Consultation” sub-menu by Veterinary Doctor.
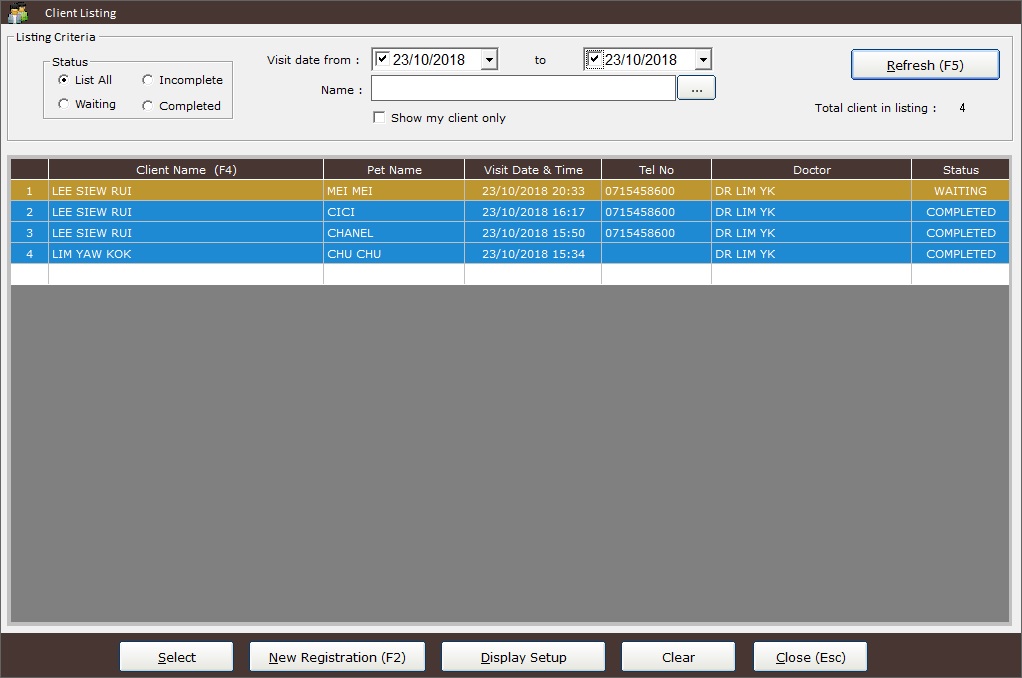
1) Veterinary Doctor can click “Waiting List” on top right.
3) Veterinary Doctor can click the "Preset Note" to just tick the "Preset Note" if do not want to type or write.
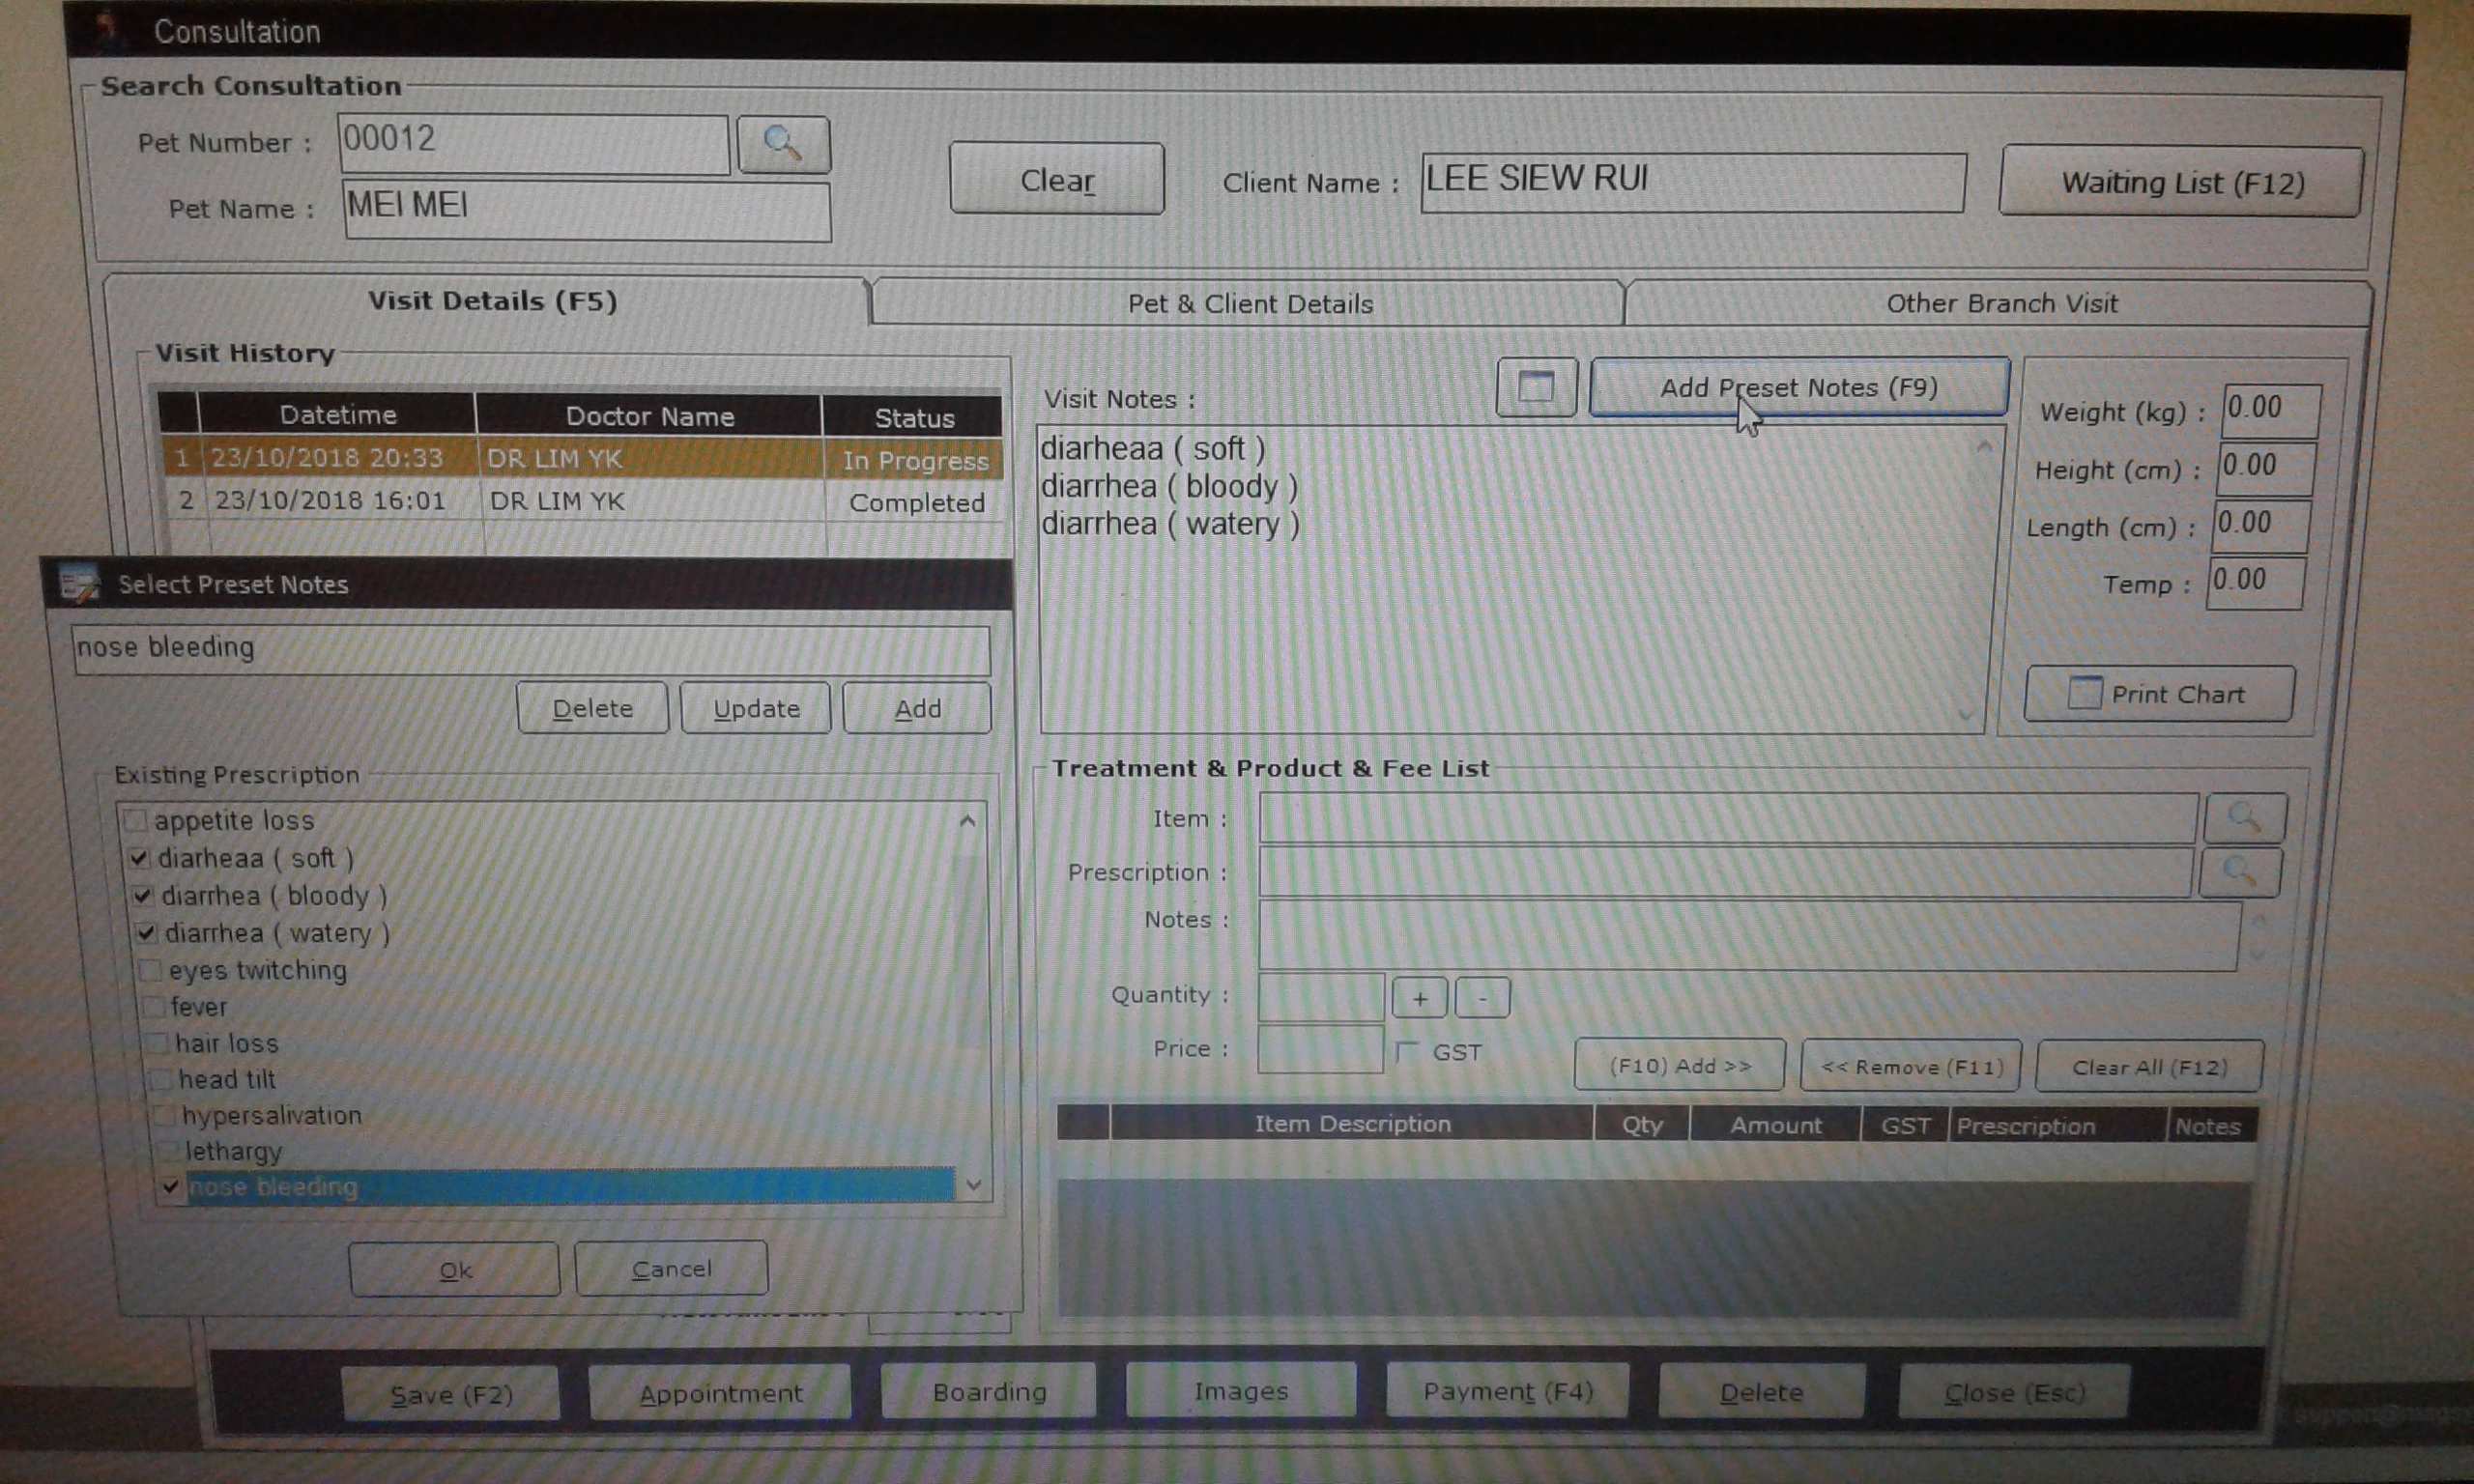
4) Veterinary Doctor can add "Prescription " and fee respectively. Veterinary Doctor also can click Images at bottom left to upload image.
5) Can click Browse images to upload image from your computer.

6) Doctor then click “Save” to send the record to “Dispensary & Payment”
Dispensary & Payment
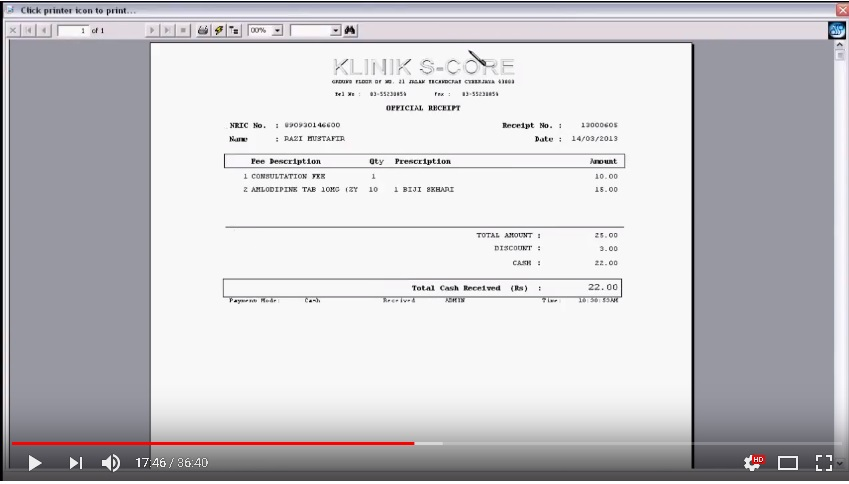
1) Staff can click “Payment Queue” on top left. Then ,Select the patient
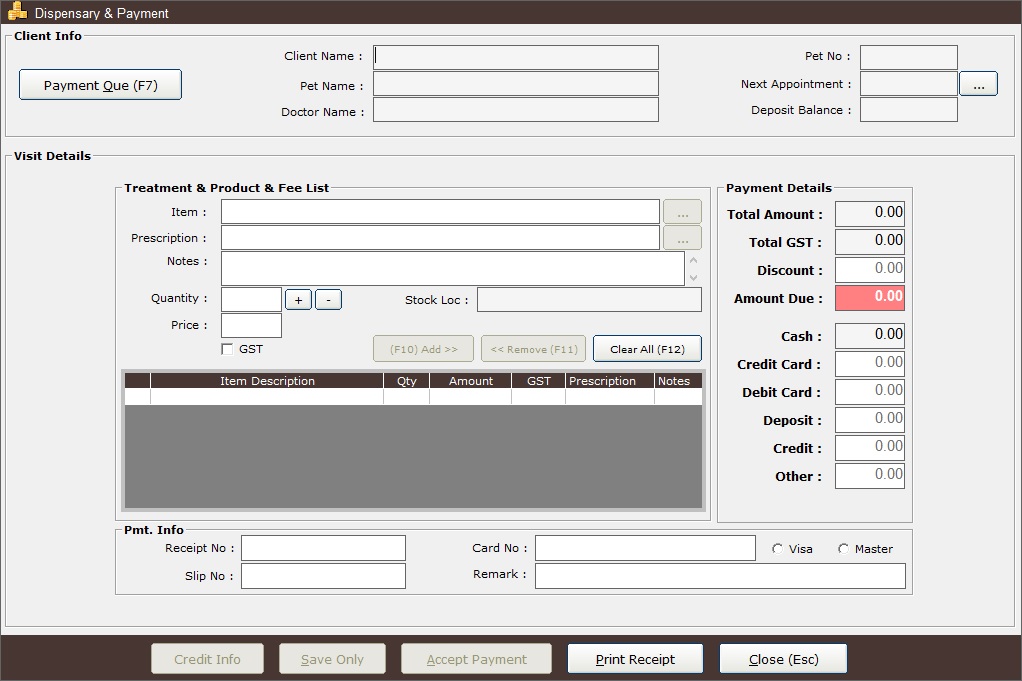
2) Receipt will show on the screen for printing.